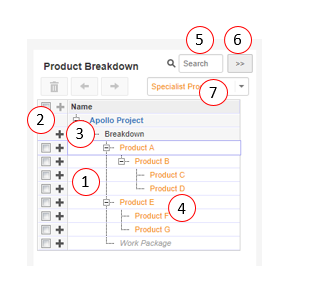
A project planning is typically a product planning. In your project in the tab Planning all products in your project are shown in the section Product Breakdown. This product breakdown contains both planned products (that are in the Gantt), and not planned product (that are not in the Gantt). The main functions of the product breakdown are:
•Drag-and-drop products to or from the Gantt.
•Create new products.
•Delete product from the project entirely.
Note: if you delete a product from the Gantt, it still exists in the product breakdown.
•Add a hierarchy to the products.
•It can be used as a product library (it should then be pre-filled in the Project Model).
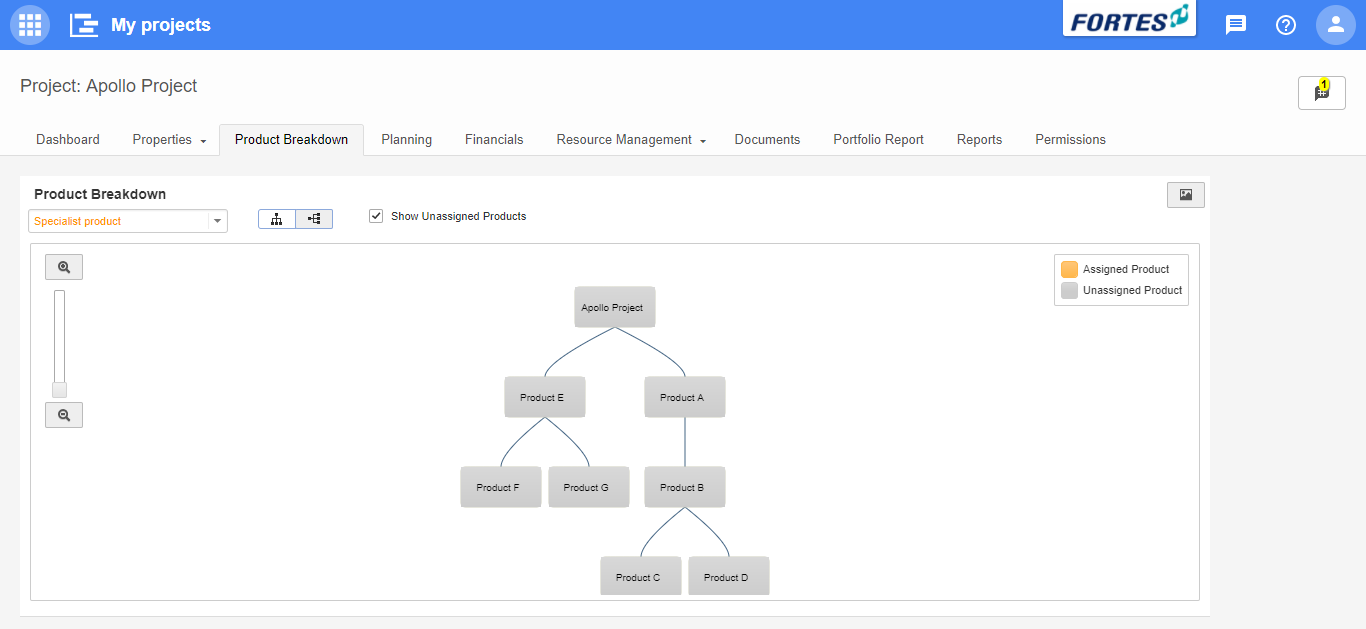
The product breakdown is visualised on the project tab Product Breakdown (see below)

The section Product Breakdown in the project tab Planning. sub-tab Gantt
Working with the Product Breakdown
Navigate to the project Gantt and click ![]() .
.
Step 1. Click ![]() to add a new product and enter a name.
to add a new product and enter a name.
Step 2. Select a row and click ![]() to delete the product from the project.
to delete the product from the project.
Step 3. To add hierarchy, select one or more rows and click one of the arrows: ![]() .
.
Note: you can also use drag-and-drop to add hierarchy.
Step 4. Products that are in the breakdown, but not in the Gantt, are shown in colour.
Step 5. You can use the search box to find products.
Step 6. Click ![]() to hide the product breakdown on the screen.
to hide the product breakdown on the screen.
Step 7. Use this drop down list to switch between specials, management and board products.

Project tab Product Breakdown
View the Product Breakdown
Navigate to the tab Product Breakdown. Products that are not planned in the Gantt ('unassigned products') are shown in grey. Products that are planned in the Gantt are shown in colour. The Product Breakdown has the following options:
Step 1. Click the drop down list to select the type of the product to show: ![]()
Step 2. Zoom in and out (to the left of your screen)
Step 3. Show or hide the unassigned products
Step 4. Show the product breakdown vertical or horizontal ![]()
Step 5. Click ![]() to save the breakdown as an image.
to save the breakdown as an image.