A view can be changed or defined to suit your needs. This topic describes how you can define which data (columns) appear in your view, in which order they are shown, and with which sorting. You can also set the number of rows to display.
Create a view: set columns
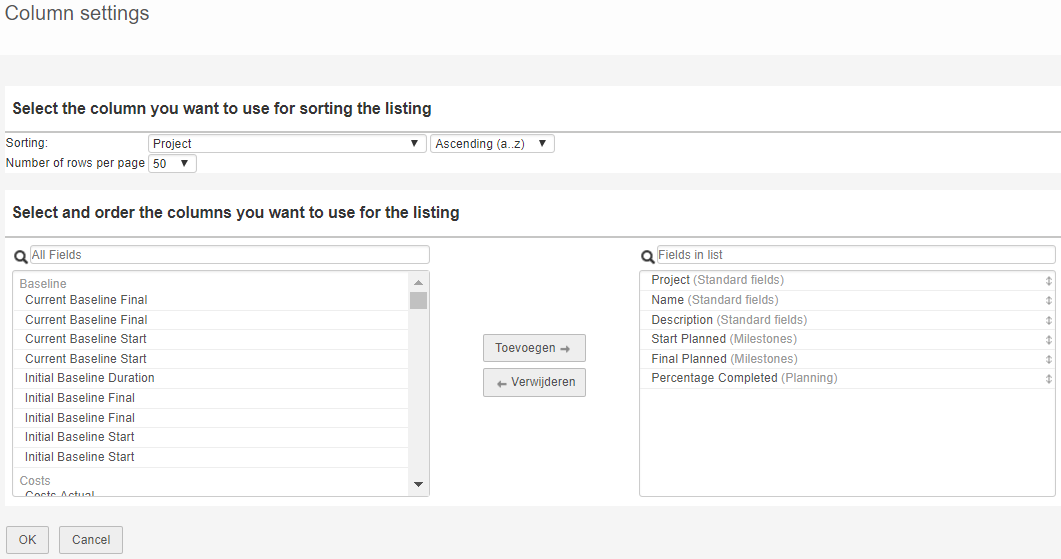
Step 1. In a view, click View, then Set Columns, a pop-up appears:

Pop-up Column settings: the left side shows all available fields, the right side shows the fields in the view
Step 2. To add or remove a column in the view, select a field and click Add or Remove. You can also use drag and drop or you can double click a field to add or remove it. When looking for a specific field you can use the search box to find it more quickly.
Step 3. On the right side, in the section Fields in list, use drag and drop to change the sequence of the columns in the view.
Step 4. In the top of the pop-up you can add sorting to the view and define the number of rows per page. When the view is as you want it, click OK.
Note: to sort a view you can also click any column header.
Step 5. The view appears on your screen with the name "-- Custom view --". You can save the view for re-use, see Save a view for re-use.